Author Archives: Gayla

wood tables

7 Types of Restaurant Table Set Up to Leave a Lasting Impression on Customers

First impressions matter. We strongly believe in this quote, especially regarding table settings. The way everything is arranged greatly influences the overall ambiance. Paying close attention to detail highlights cleanliness and organization. Conversely, a messy table setup can instantly ruin the mood. A host’s first responsibility is to create the right ambiance in a restaurant. And a proper type of table setting has a huge role to play in this!

Service quality and dedication are reflected in a well-arranged table. Attention should be given to the smallest details, from napkins to tablecloths and silverware. It greatly influences the comfort offered to customers. That’s why we have compiled a detailed list of the types of restaurant table settings we can have. This guide will help readers understand the dynamics of different table settings. We have included seven different styles of setting up tables, from casual to fine dining.

What are the restaurant table setting types?

Detailing the components is the key to setting a table in a restaurant. But to do so, it’s crucial to learn about the varied setting types and what they entail. For instance, a fine dining setting will never be the same as that of a themed restaurant table setup. That’s why we have briefly described the seven most popular table-setting types below.

1. Formal Table Setting

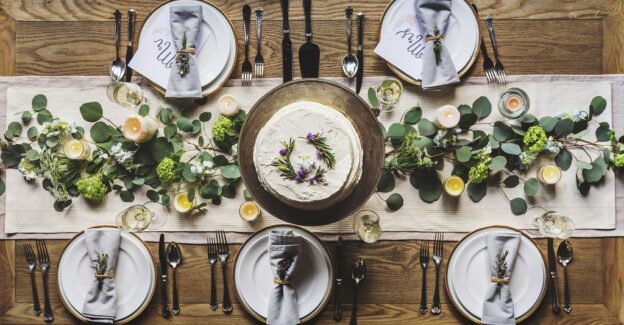
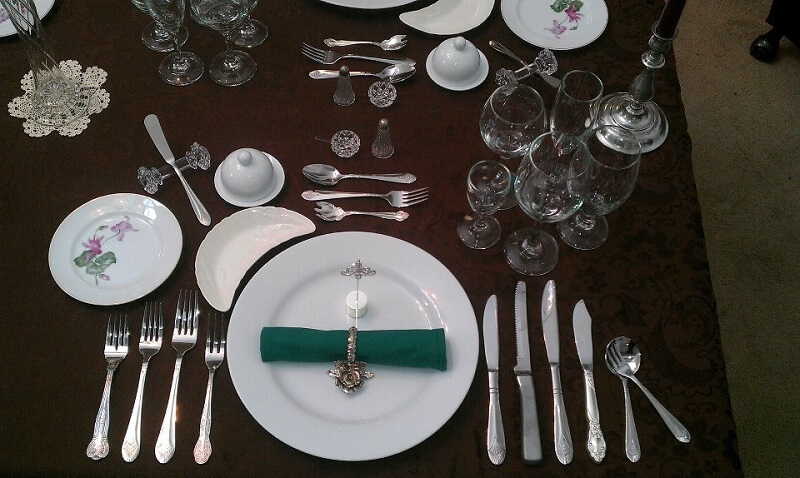
This type of table setting is the preferred choice for weddings, fine-dining restaurants, and corporate parties, etc. The formal table setting is the most symmetrical and well-balanced and requires the maximum number of utensils.
Formal-table-setting
  • The centerpiece goes in the middle of the table.
  • Each of the placemats lies near the edge paralleled and in a straight line. The formal table setup uses a charger plate to serve the salad course, soup course, etc.
  • Folded napkin in a triangular or square pattern along with the menu card goes on the top of the charger before serving the meals.
  • Starting from the edge of the table, place the salad fork, fish fork, and dinner fork on the left side of the charger.
  • Similarly, on the right side of the charger, place the soup spoon, salad knife, and dinner knife starting from the outer edge of the table.
  • Other utensils like butter knife and plate, dessert spoon and fork, glasses, etc. go on the top of the charger.

2. Casual / Informal Table Setting

An informal or casual table setup fits perfectly for dinner parties, casual weddings, and family occasions. These types of table setting requires fewer utensils and gives you more flexibility in arranging them on the table.
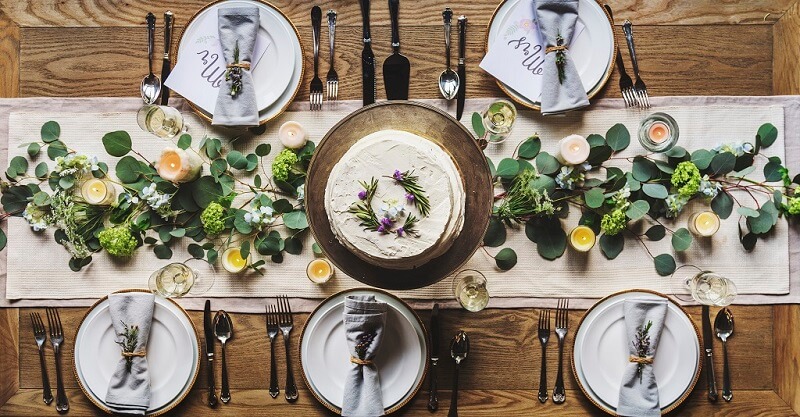
Casual-table-setting
  • Although the charger is optional, you provide the service plate for serving the salad course, soup course, etc.
  • Just like the formal setting, a napkin goes on the top of the service plate along with the menu card.
  • On the left side of the service plate, keep the salad fork at the outer edge and dinner fork on the immediate left of the service plate.
  • Put the soup spoon, salad knife, and dinner knife starting from the outer edge of the table on the right side of the service plate.
  • Dessert teaspoon, water, and wine glasses go at the top of the service plate.

Some of the major type of informal table settings restaurants usually have to do are:

  1. Family-style table setting: This will require a setting of a minimum of four people. Everything, including the tablecloth, napkins, and centerpiece should be sharp and prominent.
  2. Casual daytime setting: This setting should focus on coziness and freshness. Using vibrantly colored tablecloth and a flower vase as the centerpiece will be best.
  3. Café/Bistro-Style: Café styled table setting usually focuses on smaller elements. We recommend using tableware specific for beverages and light snacks.
  4. Breakfast Table Setting: A breakfast table setup offers a convenient and functional way of arranging basic utensils on the table. Although the types of table settings don’t need to look lavish or expensive, you can arrange the basic, minimum utensils on the customer’s table.

    – Place the plate at the center along with the fork and napkin to its left.
    – Keep the other types of silverware like the butter-knife or spoon on the right side of the plate.
    – Put the glasses for juice, water, and bowls for cereals on the top of the plate.

3. Buffet Table Setting

Whether you are serving your guests or it is a buffet dinner, buffet table setup is perfect for customers who like to get the food on their own. Customers’ tables include just the essential utensils as spoons, forks, plates, etc. are stacked at the end of the buffet line.
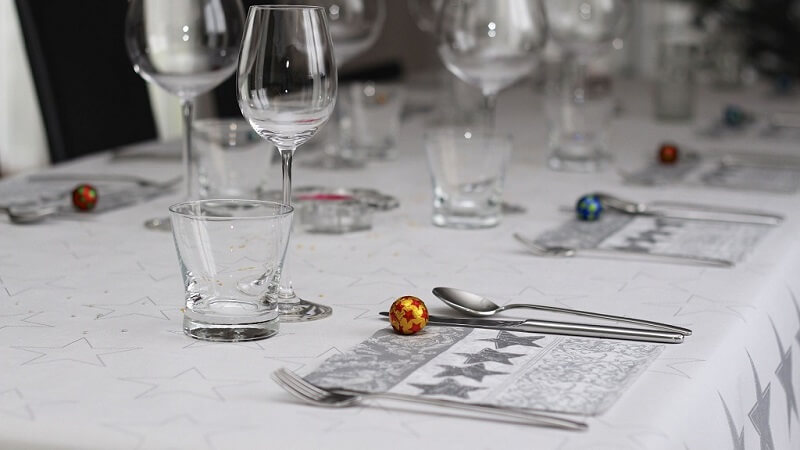
buffet table setting
  • As the guests pick up the plates and food from the buffet table, there is no charger or service plate on their table.
  • In the center of the table, place the folded napkin and menu or name card on the plate. Alternatively, you can stack the napkins on the buffet table as well.
  • Starting from the outer edge, place the salad fork first, and then the dinner fork on the left of the plate.
  • Similarly, keep the dinner knife on the immediate right of the plate, followed by the soup spoon.
  • Water and wine glasses go at the top of the plate.

4. Party Table Setting

A party-styled restaurant table setup should contain fun and celebratory elements. These will set the right mood and lighten up the air. Since parties often have a specific theme, the table elements should also follow the same pattern or trend.

  1. Placemats and tablecloths should complement the party theme. 
  2. Napkins can be folded creatively, like in the shape of a bird or a flower. 
  3. Flatware and dinnerware should have complementary colors and patterns. 
  4. Themed drinkware and colorful glassware can be incorporated into a party table setup. 
  5. We recommend using a statement centerpiece, such as a themed sculpture or an elegant floral arrangement. 

Party table settings can be further categorized into three different styles. 

  1. Cocktail table settings: These table setups require finesse and meticulous attention to the details. Every element, including dinnerware, tablecloth, and centerpieces should match the color theme. 
  2. Kids’ party table settings: A kid’s party table setup can be boosted with decorative elements. These may include confetti, themed signage, or streamers. 

Themed party settings: Special party setups can have specific themes. For instance, an anniversary party table setting may have bold colors and patterns.

5. Pizzeria Table Setting

One of the favorites for many people across the globe, a pizzeria table consists of the most basic restaurant table setting serving the guests. The most popular set up consists of one each of a plate, knife, fork, spoon, glass, and napkin.
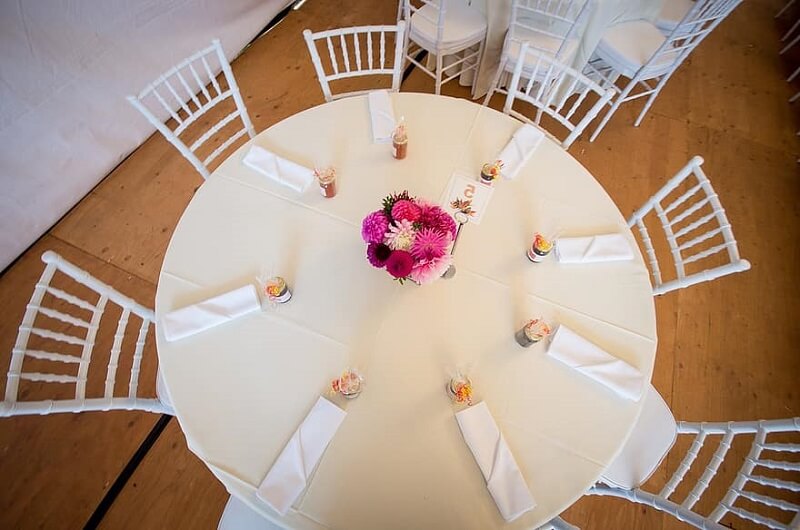
Pizzeria-table-setting
  • Put the fork on the left of the diner’s plate with a napkin underneath it.
  • Place the knife and spoon on the right side of the plate.
  • The glass goes in the upper right corner of the plate above the knife.

6. Outdoor Table Setting

This table setting type is also known as Alfresco dining setup. It requires a few special considerations in the outdoor restaurant furniture given the fact that everything needs to be outside. Using the regular furniture or tablecloth won’t be feasible. Comfort does take the top priority. But it’s important to create a table setup that allows people to enjoy both food and the outdoor ambiance.

  1. Furniture like tables and chairs should be weather-resistant and durable. We would also like to add a few seat cushions for more comfort. 
  2. unbreakable acrylic glasses will be best for an outdoor table setup. 
  3. Acrylic or vinyl tablecloth and placemats are the best option. These are spill-resistant and can add a comforting touch to the aesthetics.
  4. For centerpieces, we would recommend using flower vases with green twigs to complement the natural surroundings. If it’s nighttime, a candlestick arrangement would also do the magic. 
  5. Lanterns and small mason jar lamps can create a magical experience for the guests.

7. Themed/ specialty table setup

This is one of the most exciting arrangements among the 7 types of table setup. We believe it gives enough independence to the hosts for customization. The choice of tablemats or centerpieces can be aligned with the specific theme. Here are a few key themes usually preferred in restaurants.

  1. Christmas-themed table setup: For this, we would recommend following the specific color scheme: white and red. Tablecloths and glassware having intricate gold detailing will add more value to the aesthetics. Centerpieces can include Christmas-scented candles for more coziness.
     
  2. Halloween-themed table setup: This type of table setting will require fun and spooky elements. A decorative pumpkin-shaped centerpiece will do wonders for the entire restaurant table setting. We also recommend using spooky decorations like a skeleton-printed tablecloth for added fun.
  3. Birthday-themed table setting: Fun and exciting décor will be the key to unlocking the perfect table setup for birthdays. We would recommend going with the color code of the event. Glassware and dinnerware should be shatterproof so that they won’t break easily. As for centerpieces, a Balloon bouquet or a decorative cake display would be amazing.

What is the Table Setting Etiquette?

Understanding the basic dining etiquette for setting up a restaurant table can help your business grow substantially. Irrespective of the type of table setting, here are the most elementary guidelines for how to set up tables.
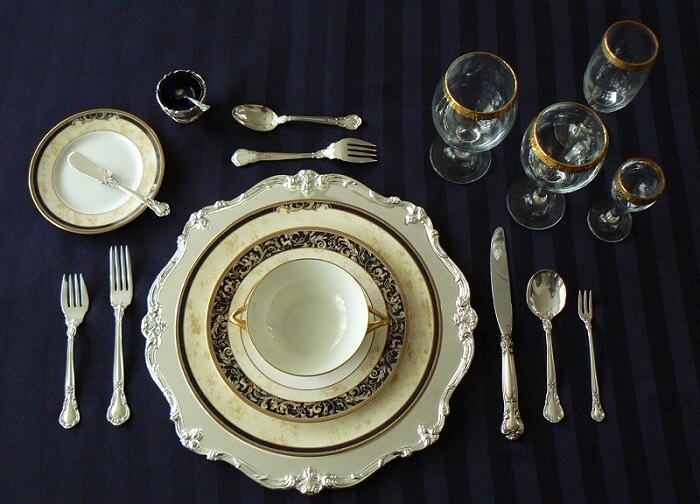
table setting etiquette
  • Arrange the utensils in the order your guests will use them. For example, since you will serve the salad first, place the salad fork at the outer edge before the dinner fork.
  • Keep the forks on the left side.
  • Except for the butter knife that goes on the top of the plate, place all knives on the right side with their cutting blade facing the plate.
  • The spoons should always be placed on the right hand side of the plate.
  • Align utensils by their bottoms and maintain a gap of at least one inch between them.
  • Select the proper, suitable table sets and utensils. Keep only the utensils that go with the dishes that you will be serving. For example, if there is no salad, don’t put the salad fork on the table.

Select the Proper and Suitable Table Sets

While the points above highlight the importance of table settings according to the occasion, you must not underestimate the selection of suitable types of table setting for your restaurant. Table sets that match with your restaurant design are crucial in providing the best dining experience to your guests. Well-selected table sets not only enhance your restaurant layout, but they also set the tone for a memorable time during their stay. Depending on the theme you wish to create in your restaurant, you can choose from several table sets in vintage, modern, retro, or industrial design styles. Moreover, you get plenty of style, finish, color, and shape options in table sets made from materials like wood, plastic, or metal.
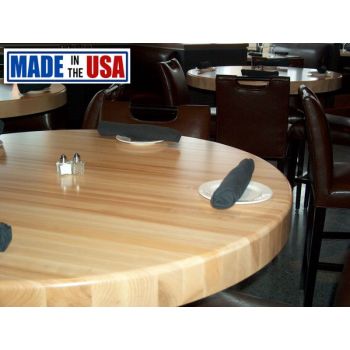
Table Settings According to the Restaurant Types

Apart from setting tables according to the occasion, must ensure the type of restaurant too for the appropriate décor. As restaurants have their separate sets of target customers, ambiance, working atmosphere, etc., their tables must reflect that as well. Let’s quickly take a look into the traits of some of the most common restaurant types

  • For Fast Food Restaurants: Since fast food restaurants are designed for quick meals or takeout, there’s no need to set tables. You can use paper bag or plastic trays to serve food with disposable cups and silverware. Laminated restaurant tables are ideal for such setting as they are easy to clean during rush hours and require minimum effort to maintain.
  • Casual Dining Restaurants: In casual dine-in restaurants and cafes, you usually serve food in disposable or easy-to-clean plates and baskets. In such setups, you can use casual silverware and paper napkins to set up your table with minimal effort. Padded tables made from laminate, resin, aluminum, etc. are affordable and yet give a premium look and feel to your customers.
  • Fine Dining Restaurants: In formal dine-in restaurants like steak house, you have to ensure that the table is set up perfectly. These arrangements includes use of cloth napkins with high-quality silverware. Similarly, use nice plates with matching glassware for serving foods to your guests. In such restaurants you can opt for tables made from butcher block, granite, quartz, and many more. The tables with upholstered wood chairs that look elegant, reflect luxury, and offer maximum comfort can also be used.

Pay Close Attention to the Table Setting as per the Occasion

As you might have understood by now, the bottom line of table setting is to arrange various items. These 7 types of table setups include items like silverware and other essentials on the table according to the occasion. By paying close attention to a restaurant’s table setting and the type of occasion, you can gain an advantage over competitors. It not only boosts your confidence but also creates a good first impression for your guests. Properly set tables complement the restaurant’s design and ambiance, making it visually appealing for your guests. Hopefully, by taking note of the points mentioned above, you will be able to provide the best dining experience for your guests and run a profitable business.

FAQs:

Q. What is basic table setup?

A basic table setup includes four essential items: a fork, knife, spoon, and napkin beside the plate.

Q. What are the 5 types of table setting?

The five most common table settings are formal, informal, Basic, Buffet and Five-course.

Q. Why table setting is important for restaurants?

Table settings are quite important to ensure that your customers are comfortable, it helps you create customer friendly atmosphere and sets the customer expectations right.

Q. What is the golden rule of table setting?

The golden rule of a simple table setting is to work from the outside in. It means the outermost utensil should be kept first and then gradually moved to the inner side.


Navigating Restaurant Furniture Selection for Success

Opening a restaurant is no small feat—it’s a balancing act of creativity, logistics, and compliance. Amid the rush to hire staff, plan menus, and obtain permits, furniture decisions may seem minor. But let’s flip the script: what if your seating plan and furniture choices could make or break your restaurant’s opening night success? In this light-hearted but educational guide, we’re helping new restaurateurs navigate furniture selection with confidence and style—because great dining experiences begin before the food arrives. Let’s walk through spacing strategies, materials that endure, and why your server’s stride matters more than you think.

Start with the Flow: Restaurant Furniture Placement

Furniture isn’t just functional—it defines the energy and flow of your space. Every table, chair, or booth should support a seamless experience, not only for diners but also for your hard-working servers weaving through peak-hour rush.

Seating Spacing: Your First Blueprint

The golden rule in restaurant layout? Don’t cram. Standard spacing between tables should allow guests to feel comfortable while allowing staff to navigate efficiently. According to the National Restaurant Association, the average allowance per seated diner is 15–18 square feet. This ensures that diners have personal space and staff aren’t bumping elbows—or trays.

  • Allow at least 24 inches between corners of square tables.
  • Leave 36 inches between chairs back-to-back to accommodate walkways.
  • Provide at least 42–60 inches of clearance for main server aisles.
Default Image

Material Matters: Choose Restaurant Furniture That Lasts

Before you fall in love with a look, think durability. Restaurant furniture endures constant wear, so every table and chair must work as hard as your team. The material isn’t just an aesthetic choice—it’s a strategic decision.

Hardwoods, Butcher Blocks & Beyond

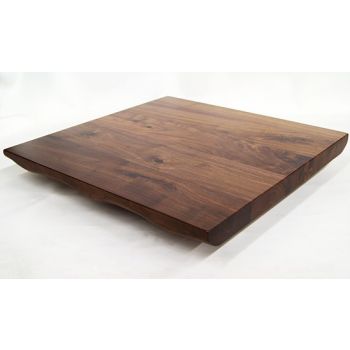
Commercial restaurant tables are not created equal. Missouri Table & Chair’s butcher block table tops are made from North American hardwoods and sealed with food-safe finishes. Their strength isn’t just cosmetic—they’re warp-resistant, fastener-holding, and ready for heavy use in high-volume dining environments.

  • Wood frame chairs bring warmth and classic styling to traditional or rustic spaces.
  • Laminate restaurant tables are budget-friendly and perfect for fast-casual or franchise environments with frequent turnover.
  • Granite table tops provide luxurious, easy-to-clean surfaces for upscale experiences.
Default Image

Don’t Forget the Crew: Designing for Service Efficiency

Your restaurant isn’t a static showpiece—it’s a living, breathing operation with moving parts. That includes servers navigating with trays full of drinks or hot entrées. Furniture that hampers staff movement slows down service and increases risk.

The Service Path Strategy

Picture this: a server dodging a tightly packed chair to deliver your filet mignon. Not ideal. Designing service pathways with intention can mean fewer spills, faster table turns, and happier guests. When planning furniture placement, ask yourself:

  • Can staff get from the kitchen to the dining room without bottlenecks?
  • Are chairs and bar stools easy to slide out of for quick egress?
  • Does your seating block emergency exits or violate ADA access standards?
Default Image

Furnish with the Future in Mind

Trendy spaces are exciting—but successful ones endure. Your choice of wholesale restaurant furniture should scale with your business vision. If you’re launching with 30 tables but dreaming of franchising, consistent SKU availability matters. Missouri Table & Chair specializes in durable commercial furniture, in-stock options, and reliable freight coordination so your grand opening stays on track—and future expansions stay uniform.

Match Your Vision with the Right Products

At Missouri Table & Chair, clients get free material samples, design assistance, and freight support. Choose from:

Default Image

Conclusion

Your tables and chairs do more than seat guests—they support every step of your business, from operational efficiency to brand identity. Whether you’re opening a cozy brunch café or a 200-seat gastropub, starting with the right restaurant furniture ensures that your floor plan flows, your service shines, and your dining room welcomes guests back again and again. Let Missouri Table & Chair help you furnish smarter, faster, and with style—because when furniture fits your flow, the whole restaurant thrives.

4 Steps to Attach Bases to Wood or Granite Restaurant Table Tops

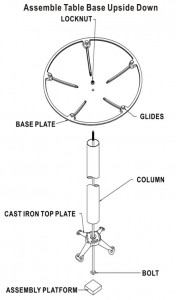
restaurant table base diagramThe freight carrier just delivered to you a skid of table tops and a skid of bases, so now what do you do?  It looks like quite a bit of work and you don’t have a clue of how to set up your new restaurant tables efficiently. Continue reading and find out how to easily set up the tables and bases without hiring a contractor.

Step-by-Step Process to Attach Table Bases to Wood or Granite Table Top At Restaurant

Step 1 – Gather Materials

Before the truck line arrives and delivers your table tops and bases, have these tools ready:  extension cord, drill, extension bit (optional this is to hold Phillips bits), several

#2 Phillips bits, a couple of soft blankets, measuring tape, some small drill bits, masking tape, black marker, pencil, a long about 4 feet straight edge (a piece of wood or a yard stick) and a piece of string about 6 feet long.

These are common tools and with them you can assemble just about any table to its’ base.

At this point you may be asking why the manufacturer didn’t just ship my tables and bases already assembled.  The answer is simple: money and damages.

Money because assembled tables are more difficult to box and take up quite a bit more room in the truck, where the cost to ship goes way up.

Second, if tables are set up prior to shipping, the odds of your tables and bases arriving undamaged are small in a common carrier.  That’s a type of freight carrier where your tables and bases are mixed in with other people’s freight.

Other than hiring the assembly to a carpenter or handyman, the most cost efficient way to assemble tables and bases is do it yourself.  Now that you have accumulated the tools, and have accepted the freight, the first thing to do is be organized when opening the boxes, do not just scatter parts.

Step 2 – Prepare Installation Area

First, if you have the room, put all the granite or butcher block table tops near where they will end up, being careful not to scratch the tops, then assemble the bases per those instructions.

Then put the restaurant table bases with the table top they are assigned to and now the bases and table tops are matched correctly together.  You are now ready for the next step of putting the table tops together with the bases.

Put your soft blanket on the floor and put the finished side of the table down.  Now you will need to find out where the base should go on the bottom of the table.

Most all bases are going to have a 3” or 4” column and the center of that column matches is where the table bottom should be marked.

If you are using the cross style table bases, you can point the base legs to the corners or sides of the table.  Consider what position you think is more comfortable for your customers.

Step 3 – Prepare Tables and Bases

Square tables – Take your straight edge and marker, draw a line from one corner to the opposite corner and where they intersect is where the center of the column should be placed.

There is a plate that attaches to the table bottom called a spider, and the plate can be square plate or one with 4 or more arms.  Use the lines you made on the table bottom to get this plate centered.

Rectangular tables – Treat them like the square tables.  Sometimes you will have a rectangular table top that takes two bases.  Generally 12” to 15” from both edges of the table is where to center those columns.

Set the two bases on the table bottom and set the distance from the edge at 12” but adjust the distance slightly depending on how the base-table top relationship looks to you and the comfort you want for your customers.

You might be surprised at all the specific situations tables are used, so that is why there is a range of placing the bases rather than an exact measurement.

Round tables – Finding the center is a little more tricky on round tables, but not difficult.  This is where you use your string and pencil.  Tie the string around the pencil and the string’s length should be one half of the diameter.

For example, if your table is 36” in diameter mark the string, but don’t cut it at 18”. Hold the string with the 18” mark at the edge of the table and make a small arc about 6” long in the center of the table.

Pick several other random points at the edge of the table and make the same arc. Where all these arcs cross is the center of the table.  Draw a line about 15” or so through the center and make another line perpendicular (you can use the square edge of a piece of cardboard) to it also about 15” long.

Now you have the center of the table marked just like the square or rectangular table tops.  Fore more detailed information, read our instructions on finding the center of a round table.

Step 4 – Drill Tables and Attach Bases

Drilling the screws into the table top is final step.  With restaurant butcher block table, the holes will need to be pre-drilled, so if the bases are placed where you want them on the bottom of the table (remember the top of the table is still on the blanket facing the floor) mark the spots where the screws will attach and the base so it is put back in the same spot.

Remove the base or bases from the table bottom. The drill bit to pre-drill the holes should be smaller than the shaft of the Phillips screws you are using.

If the screws are 1” long and the table top is 1 ½” then put a piece of masking tape about 1” away from the tip of the drill bit.

This will let you know where to stop drilling because you don’t want to drill through the table top.  Once the holes have been pre-drilled in the table, you can return the bases to the position where you marked the holes and use the drill, extension and Phillips bits to secure the bases to the tops.

Putting screws into granite tables in a restaurant is the same as the butcher block tables, except the bottom is typically plywood, so after marking where the column goes, place the bases on the table, then you can then just use the drill to screw in the Phillips screws.

Now simply have two people turn the tables upright on the installed bases. Take a minute to adjust the levelers and wipe the table top down.

You are now ready to serve your customers on your restaurant’s brand new tables and bases.

restaurant furniture

4 Reasons To Not Buy Residential Furniture for a Restaurant

Many potential restaurant owners are overwhelmed by the amount of information and planning that goes into opening a new restaurant.

There are many different aspects of planning for a new restaurant, including designing the menu, and purchasing all of the equipment for the back of the house, and furniture and decorative furnishings for the front of the house.

The new restaurant owner may not realize when considering purchasing restaurant chairs and tables that there are differences between dining sets for home use and the commercial furniture that is designed specifically for the restaurant and hospitality industry.

This blog covers some of the important reasons to consider purchasing commercial restaurant furniture from the beginning.

1. Design

When purchasing tables and chairs for residential use, the main design qualifications are whether the chairs and tables fit in the space and look great.  It would appear the same would be true for chairs and tables in a restaurant, but that is not the case.

Why is there a difference?

Well, consider entering a restaurant where there are many tables in a seating area, or a bar area with multiple barstools.  While a single dining set may look great in a home, that same set may look awful if placed with 10 or 20 additional dining sets.

Commercial seating is designed differently to create a great overall look.  Restaurant chairs are generally designed lower in height for example, so you do not observe a sea of chair backs.  Widths of chairs, table heights and supporting bases are examples of custom design that usually goes into each restaurant.

2. Durability

In general, residential furniture will not be as durable as commercial chairs and tables, and doesn’t need to be.  Consider that a home dining set may be used a couple times a day for families eating lunch or dinner.  Commercial tables and chairs may be used all day long with multiple diners.

Also, the homeowner who has purchased tables and chairs is more likely to clean and maintain them, than a restaurant customer would who has no vested interested in the furniture.  This is why residential furniture will have more parts that would fail in commercial use.

For example, commercial patio chairs are usually welded, but for a home they may have bolts holding the joints together.

3. Materials

Many bold cotton fabrics are found in home dining sets and they look fantastic!  But commercial seating would not be manufactured with these same fabrics, as they are less durable and harder to maintain.

Vinyl is frequently used in commercial seating applications because vinyl is very easy to maintain, clean and repair.

Table tops and chairs in a restaurant will more likely have a durable, high traffic finish on the wood parts like polyurethane, but a lacquer or a conversion varnish may be successfully used on a table designed for home use.

Better materials are typically found in a commercial application due to the higher use in a restaurant, so the expense of maintenance can be put off longer.

4. Budget

When a homeowner considers purchasing a dining set, they may have planned and saved for this purchase or may be buying furniture for a new home.

A homeowner’s budget and needs vary widely from a restaurant owners.  The homeowners’ main requirements for dining sets are that they accommodate a certain number of diners and fit their personal style.

A restaurant owner will want the restaurant tables and chairs to fit their personal style, but they must also consider the overall cost of the furniture and if it fits the necessities of the restaurants’ diners.

Restaurant owners almost always have to consider the cost of every purchase, including seating, which is typically not the case in a home.

The durability of commercial restaurant furniture is usually commensurate with the cost.  Residential chairs and tables that will have to be replaced more quickly will cost the restaurant owner more in the long run.

4 Quick Tips To Use Restaurant Granite Table Tops

Restaurant owners like restaurant granite table tops because they are gorgeous, easy to clean andgranite restaurant tables low maintenance.  However, there are some factors that need to be considered before purchasing.

Here are 4 tips restaurant owners need to know when considering purchasing restaurant granite table tops.

1. Outdoor Use

Granite tables can be used outdoors, because granite is a common rock that is found outdoors all the time. That being said, when granite is manufactured for use as a table top, normally there is a plywood base on the bottom of the table for attaching the table base.

If the granite table top is going to be used outdoors, it is important that the plywood that is glued to the table bottom, or under the veneered granite, is protected from the weather. Marine grade plywood works well, but should be protected from moisture.

What many people do not know is that granite gets very hot in the sun, especially darker granite colors.  Granite can even get hot enough to burn skin.  Consider using an umbrella, lighter colored granite, or a mesh net to block out some of the sun to prevent the granite becoming extremely hot.

Consider putting the tables under some type of overhang where they are protected from the sun.  If the granite tables will be in an extremely sunny or warm climate all year round, switching to another table top material such as resin may be a better alternative.

One final tip about using granite table tops outdoors is they are polished and reflect the sun like a mirror, which can be annoying, even blinding to customers if no protection from the sun is used.

2. Matching Granite Tops with Bases

Solid granite table tops need to be supported with a quality base to prevent wobbling or even tipping over.  There are four components of a quality base that need to be considered.  First is the thickness of the metal which is better at 18 gauge or less.  Second is the size of the base bottom.

The third consideration is the diameter of the column.  Fourth is the size of the top plate.  The rule of thumb with matching table tops and bases is to purchase larger, heavier base, which will add to the security of the base. The cost to purchase a restaurant table base that is one size larger is relatively inexpensive.

3. Granite Table Top Assembly

It is important to know how the granite table top is manufactured before purchasing.  Does the granite table top have plywood attached to the granite for attaching the table base?

If not, someone will have to cut and attach the plywood.  Applying the glue to attach plywood to granite can be messy and difficult.  Before purchasing granite tables, ask the vendor how the table and base will be assembled. Check out granite table top buying guide before making a purchase decision. It will help you make a right choice.

4. Maintenance

Granite table tops are generally very low maintenance.  Occasionally, though, issues may arise like cracks or chips that will need to be addressed.  Filling in these cracks or chips with a colored epoxy glue that matches the table top color will usually solve these two issues.

Bases should also be inspected at the start of every shift to ensure the levelers are in place and the tables are level, which will increase the table base and table top durability.

In summary, knowledge is the key to purchasing granite table tops.  Knowing these 4 tips about restaurant granite table tops when purchasing will make the process much easier.